Introduction
Overview
Direct burial lamp posts, LED in-ground lighting, and light pole installations represent a modern approach to outdoor illumination. These innovative systems integrate advanced LED technology with sleek design, allowing for a seamless blend into various landscapes. By embedding light sources directly into the ground or discreetly mounting them on poles, these solutions enhance the overall aesthetic while delivering reliable, energy-efficient performance.

Benefits
This advanced lighting approach offers several significant benefits:
- Energy Efficiency: Utilizing state-of-the-art LED technology, these installations consume far less power compared to traditional lighting systems, resulting in lower energy bills and reduced environmental impact.
- Environmental Friendliness: With longer lifespans and minimal maintenance requirements, these systems support sustainable practices and contribute to a greener future.
- Enhanced Safety: High-quality, consistent illumination improves nighttime visibility, enhancing safety for both residential and commercial areas.
- Low Maintenance: Designed for durability and long-term performance, these lighting solutions require minimal upkeep, making them a cost-effective option over time.
Applicable Scenarios
These versatile lighting solutions are ideal for a wide range of applications:
- Residential Yards: Create a warm, inviting ambiance that highlights landscape features and boosts curb appeal while ensuring safety.
- Commercial Streets: Modernize urban areas with sleek, efficient lighting that improves visibility and enhances the overall aesthetic of commercial districts.
- Public Facilities: Ensure reliable illumination in parks, campuses, and community centers, promoting safety and accessibility in high-traffic environments.
Pre-Installation Planning & Preparation
Before any physical work begins, thorough planning and preparation are essential to ensure a successful installation. This phase establishes the foundation for a smooth project by identifying site-specific challenges, meeting regulatory requirements, and assembling the necessary tools and materials. Detailed pre-installation planning minimizes unforeseen obstacles, enhances safety, and promotes adherence to best practices and local codes.
Needs Assessment & Site Survey
A comprehensive site survey is the first critical step in the planning process. This involves conducting precise on-site measurements and environmental evaluations to gather essential data about the project location. Key tasks include:
- On-Site Measurements & Evaluations:
Assess the overall topography, identify potential obstructions, and note existing landscape features that could influence the placement of your lighting system. - Soil Condition & Water Drainage Analysis:
Analyze the soil type, density, and moisture content to determine foundation requirements and whether additional reinforcement is necessary. Proper drainage analysis is vital to prevent water accumulation that could compromise the installation’s stability and longevity. - Optimal Location & Lighting Coverage:
Evaluate the best location for the installation by considering both functionality and aesthetics. Determine the ideal placement to achieve balanced illumination across the area. Factors such as light distribution, ambient conditions, and proximity to key features must be considered.
Regulations, Permits, & Safety Requirements
Adhering to local regulations is crucial for both the legality and safety of your project. This step ensures that your installation meets all necessary standards and minimizes potential legal issues:
- Understanding Local Codes:
Familiarize yourself with local construction, electrical, and installation codes. These guidelines dictate the standards for materials, installation practices, and safety protocols required for your project. - Securing Permits & Approvals:
Obtain all necessary permits and approvals from local authorities. This process often involves submitting detailed project plans and may include inspections to verify compliance with regulations. Securing proper permits not only ensures legal conformity but also adds credibility and professionalism to your project. - Implementing Safety Measures:
Develop comprehensive safety protocols and operational guidelines. Outline potential hazards, establish emergency procedures, and ensure that all team members are trained in safety practices. This proactive approach minimizes risks and fosters a safe working environment throughout the installation process.
Tools & Materials Checklist
A well-prepared checklist of tools and materials is critical to streamline the installation process. Being adequately equipped helps avoid delays and ensures that every step is executed efficiently.

Essential Tools:
- Digging Tools:
Shovels, excavators, or trenching equipment to prepare the site and create foundation spaces. - Power Drill:
For securely installing fasteners and handling various electrical component installations. - Level:
To ensure that lamp posts and light poles are accurately aligned for optimal performance. - Concrete Mixer:
Necessary for preparing and pouring the concrete foundation that stabilizes the structure.
Required Materials:
- Lamp Posts:
Robust structures designed for durability and optimal light distribution. - LED Fixtures:
Energy-efficient lighting units that offer consistent, high-quality illumination. - Direct Burial Cables:
Specialized cables rated for direct contact with the soil, ensuring long-lasting and safe electrical connections. - Concrete:
Used to secure the lamp posts and provide a stable, long-term foundation. - Connectors:
Essential for linking various components of the electrical system, ensuring reliable connectivity. - Waterproof Materials:
Sealants, gaskets, and other waterproofing products that protect electrical components and structural elements from moisture and weather-related damage.
Thorough planning and preparation not only enhance the overall quality and durability of the installation but also ensure that every aspect of the project complies with industry standards and local regulations. This professional, detail-oriented approach is key to a successful and long-lasting lighting solution.
3 Technical Overview of Installation Methods
Advances in lighting technology and design have paved the way for innovative installation methods that seamlessly integrate with modern architecture and landscape design. This section delves into three primary installation approaches: Direct Burial Lamp Post Installation, LED In-Ground Lighting Installation, and Comprehensive Light Pole Installation. Each method offers distinct advantages, specific use-case scenarios, and technical considerations that are crucial for achieving optimal performance and durability.
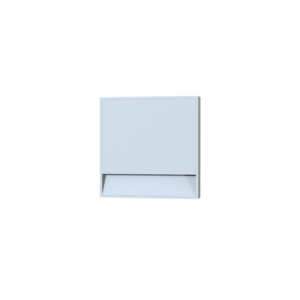
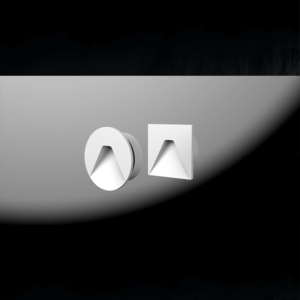
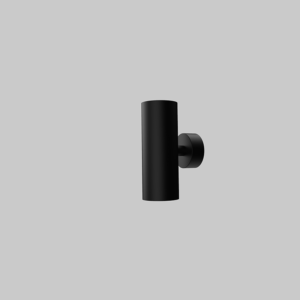
3.1 Direct Burial Lamp Post Installation
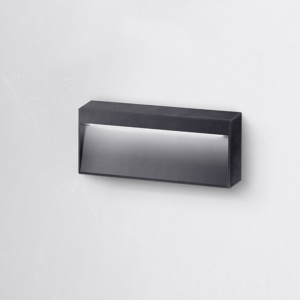
Direct burial lamp post installation is a modern solution that focuses on embedding lamp posts directly into the ground, eliminating the need for visible above-ground structures. This method is widely adopted in applications where a minimalistic and unobtrusive design is desired.

Installation Method and Underlying Principles:
The process begins with detailed site preparation. Technicians start by excavating a precisely measured hole at the chosen location. A concrete base is then poured to secure the lamp post firmly, ensuring that it remains stable under varying environmental conditions. The design of direct burial lamp posts takes into account factors such as soil pressure and moisture levels, ensuring the structural integrity of the installation. One of the core principles is achieving a seamless integration where the lamp post becomes a natural extension of the landscape, offering both aesthetic appeal and functional reliability.
Advantages and Specific Use-Case Scenarios:
This installation method offers several significant benefits:
- Low-Profile Aesthetics: With the majority of the structure below ground, direct burial lamp posts present a sleek, modern look that is particularly appealing in contemporary residential and commercial settings.
- Enhanced Durability: Being partly underground protects the majority of the installation from vandalism and harsh weather conditions, thereby extending its service life.
- Optimal for Sensitive Areas: This method is ideal for areas where visual clutter must be minimized, such as high-end residential neighborhoods, modern commercial developments, or public parks where unobtrusive design is essential.
- Space Efficiency: Direct burial installations maximize available space, making them particularly suited for compact or architecturally sensitive sites.
Critical Considerations:
While offering numerous benefits, this method requires careful attention to several technical aspects:
- Waterproofing: Since electrical cables and connections are buried, it is imperative to apply robust waterproofing techniques. This protects against moisture ingress, which can cause corrosion or electrical failures.
- Soil Stability: Evaluating the soil type, compaction, and drainage is critical. Proper soil assessment helps in designing an appropriate foundation that will remain stable over time, even in areas prone to soil erosion or shifting.
- Installation Precision: The alignment and positioning of the lamp post are crucial for achieving the desired lighting coverage and overall system performance. Precision in these areas ensures longevity and optimal illumination.
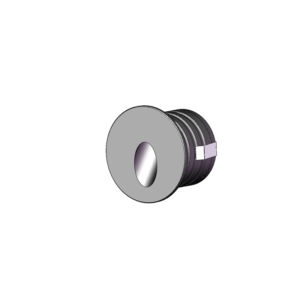
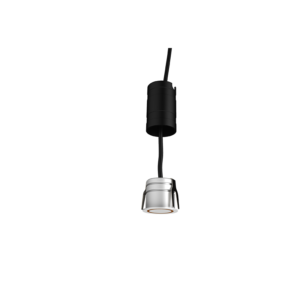
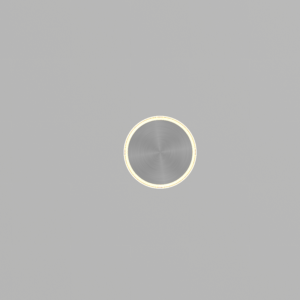
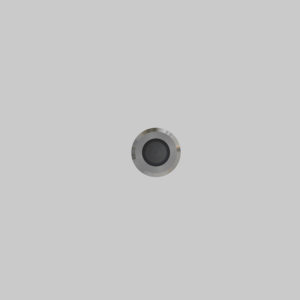
3.2 LED In-Ground Lighting Installation
LED in-ground lighting is emerging as a preferred method for modern outdoor illumination, offering an elegant blend of energy efficiency, durability, and design flexibility. This approach involves embedding LED fixtures directly into the landscape to create dynamic lighting effects that enhance both functionality and aesthetic appeal.

Benefits of LED Technology:
LED in-ground lighting stands out for its numerous advantages:
- Energy Savings: LEDs are known for their low power consumption, which translates into significant energy savings and reduced operational costs compared to traditional lighting methods.
- Longevity: With lifespans that often exceed tens of thousands of hours, LED fixtures require far less frequent replacement, resulting in lower maintenance efforts and costs.
- Durability: LED lights are built to withstand extreme outdoor conditions, from harsh winters to scorching summers, ensuring consistent performance over time.
- Design Versatility: LED technology offers a wide range of color temperatures and brightness levels. This allows designers to create mood lighting, accentuate architectural features, or provide broad illumination as needed.
Contrast with Traditional Lighting Methods:
Unlike traditional incandescent or halogen lights that generate considerable heat and require regular maintenance, LED in-ground lighting provides a cooler, more sustainable option. The reduced heat output also lessens the risk of environmental damage and contributes to a more energy-efficient system overall. Furthermore, LEDs can be integrated with smart control systems, enabling features like automatic dimming and remote monitoring, which are rarely found in conventional lighting.
Common Design Styles and Installation Layouts:
LED in-ground lighting is highly adaptable to various design preferences and functional requirements:
- Linear Arrangements: Ideal for pathways, driveways, or garden borders, creating continuous and even illumination.
- Clustered Installations: Effective for highlighting landscape features such as trees, water elements, or sculpture gardens, drawing attention to focal points.
- Modular Designs: These allow for customizable layouts that can be reconfigured or expanded over time, providing flexibility as the landscape evolves.
- Architectural Accents: Strategically placed LED lights can accentuate building facades, creating a visually appealing interplay of light and shadow.
This method is particularly popular in modern residential settings, commercial plazas, and urban public spaces where both functionality and artistic expression are valued.
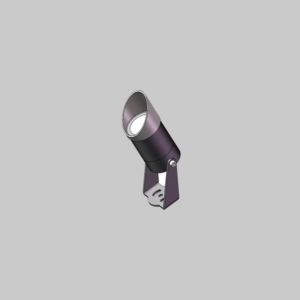
3.3 Comprehensive Light Pole Installation
Light pole installations encompass a diverse range of methods, incorporating both traditional and LED technologies. This approach involves mounting lighting fixtures on poles, which serve as elevated platforms to distribute light over large areas, making them ideal for extensive outdoor environments.
Comparing Traditional and LED Light Poles:
Traditional light poles have long been a staple in street and public area lighting. Typically constructed from durable materials such as steel or aluminum, these poles offer proven reliability and robustness. However, the emergence of LED light poles has transformed the industry:
- Traditional Poles: Often feature incandescent or halogen bulbs, offering a classic aesthetic but with higher energy consumption and more frequent maintenance.
- LED Light Poles: Integrate cutting-edge LED technology, providing enhanced energy efficiency, extended service life, and a modern, sleek design. The transition to LED also facilitates smart lighting features such as adaptive brightness control and remote diagnostics.
Material Specifications and Structural Requirements:
The success of a light pole installation relies on careful selection of materials and adherence to structural requirements:
- Materials: Choosing the right material is critical for longevity and performance. Stainless steel and treated aluminum are commonly preferred for their resistance to corrosion and durability in harsh outdoor conditions.
- Structural Integrity: The pole must be engineered to support not only the weight of the lighting fixtures but also withstand environmental stresses such as high winds, seismic activity, and heavy precipitation. Proper anchoring into a concrete foundation is essential to ensure stability and safety.
- Design Considerations: The overall design should factor in the height, angle, and spacing of the poles to ensure comprehensive light coverage. This includes balancing aesthetic appeal with functional requirements, such as minimizing light pollution and maximizing energy efficiency.
Installation Nuances and Comparative Analysis:
Installation techniques for light poles vary based on the type of system and intended application:
- Traditional Systems: May involve more manual adjustments during installation and require regular maintenance to replace bulbs and perform repairs.
- LED Systems: Although often requiring a higher initial investment, LED light poles offer lower long-term costs due to reduced energy consumption and maintenance requirements. They can also be integrated with smart technologies for enhanced control and monitoring.
Practical Case Examples:
For instance, a municipal upgrade project in a bustling urban center replaced outdated traditional poles with modern LED light poles. The transition not only reduced energy costs significantly but also enhanced the visual appeal of the streetscape with a contemporary design. Similarly, residential communities that have installed comprehensive light pole systems report improvements in nighttime safety and overall resident satisfaction. These examples underscore how modern light pole installations can outperform traditional systems in both efficiency and aesthetics.
In conclusion, the technical overview of installation methods reveals the distinct advantages and detailed considerations of each approach. Direct burial lamp post installations provide a discrete, durable solution ideal for modern residential and commercial projects, while LED in-ground lighting offers unmatched energy efficiency, longevity, and design flexibility. Comprehensive light pole installations, whether traditional or LED-based, deliver scalable and reliable lighting solutions that meet the diverse needs of public and private spaces. By carefully evaluating the technical parameters and practical benefits of each method, professionals can design and implement lighting systems that are both efficient and visually compelling, ensuring long-term performance and enhanced outdoor environments.
4. Step-by-Step Installation Process
A meticulous, step-by-step installation process is essential to ensure that your lamp post or light pole system performs reliably and safely over time. This process covers everything from initial site positioning and ground preparation to the final testing and adjustments of your lighting installation. Each step is designed to maximize durability, efficiency, and overall system performance while meeting industry standards and SEO best practices for professional visibility.
4.1 Site Positioning & Pre-Treatment
The success of any installation begins with accurate site positioning and thorough pre-treatment of the area. This phase establishes the foundation for a stable and efficient system.
- Marking the Exact Location:
Begin by identifying and marking the precise location where the lamp post or light pole will be installed. Use high-quality measuring tools to record exact dimensions and verify that the marked spot aligns with your overall lighting design. Accuracy at this stage is critical to ensure even light distribution and optimal coverage. - Taking Precise Measurements:
Detailed measurements of the installation area are necessary to determine the proper depth and width for the foundation. This includes measuring the distance from existing structures, pathways, or potential obstructions. Precise measurements ensure that the subsequent excavation and foundation work are executed with accuracy, reducing the risk of future misalignments. - Digging Foundation Holes or Trenches:
Once the location is marked, the next step is to dig foundation holes or trenches according to the specified dimensions. The depth and diameter of these excavations must adhere to engineering standards that account for soil type, expected load, and environmental conditions. Proper excavation ensures that the lamp post or light pole is securely anchored. - Ground Treatment and Drainage Planning:
Addressing ground treatment is crucial for long-term stability. This involves assessing soil compaction and moisture levels and implementing drainage solutions to prevent water accumulation. Adequate drainage planning minimizes the risk of water seepage that can weaken the foundation, ensuring that the installation remains robust over time.
4.2 Foundation Installation for Lamp Post/Light Pole
Establishing a strong foundation is a pivotal step in securing the longevity and performance of your lighting system.
- Securing the Structure:
The foundation typically involves pouring concrete into the excavated hole or trench. Use high-grade concrete mixed to the appropriate consistency for optimal strength. For enhanced durability, reinforcement techniques such as embedding steel rebar may be employed. This reinforcement is especially important in areas with unstable soil or high wind loads. - Alignment and Calibration:
It is essential to maintain perfect verticality during the foundation installation. Using levels and plumb lines, ensure that the lamp post or light pole is accurately aligned before the concrete sets. Proper alignment not only guarantees a straight, visually appealing installation but also ensures that the light is distributed evenly across the intended area. - Curing and Inspection:
Allow the concrete ample time to cure under proper conditions. An inspected and well-cured foundation will significantly reduce the risk of future structural issues. Regular checks during the curing process can help identify any deviations or weaknesses that need addressing.
4.3 Electrical Connections & Waterproofing
Once the physical structure is in place, the focus shifts to the electrical components, where precision and safety are paramount.

- Laying Direct Burial Cables:
Start by carefully laying direct burial cables from the power source to the lamp post or light pole. These cables are designed to withstand direct contact with the soil and must be installed with a gentle slope to ensure proper drainage and avoid water pooling around electrical connections. - Wiring LED Fixtures and Installing Control Units:
Follow the manufacturer’s wiring diagrams to connect the LED fixtures securely. This step involves linking the fixtures to control units, which may include sensors or remote monitoring systems. Accurate wiring is critical to prevent short circuits and ensure that the lighting system functions as intended. Detailed system testing should be conducted at this stage to verify that all connections are secure and operational. - Waterproofing and Moisture-Proofing Measures:
Protecting the electrical components from moisture is a top priority. Apply high-quality waterproof sealants around cable joints, connectors, and any exposed wiring. Use weather-resistant enclosures for control units and other sensitive components. These measures are vital not only for the longevity of the system but also for meeting safety regulations and reducing the risk of electrical failures.SEO Tip: Emphasize the importance of installation safety and robust waterproofing techniques in your content to attract a professional audience and improve search engine rankings for related technical terms.
4.4 Testing, Adjustments & Finishing Touches
The final stage of the installation process involves a thorough testing phase and meticulous adjustments to ensure the system meets all performance and safety standards.

- Adjusting Lighting Effects:
Once the system is fully wired and waterproofed, conduct a comprehensive test of the lighting output. Adjust the brightness levels, beam angles, and overall lighting effects to achieve the desired ambiance and functionality. This fine-tuning ensures that the installation meets both aesthetic and operational requirements. - Balancing Brightness Across the Installation:
Ensure that light distribution is even across the designated area. Check for any discrepancies in illumination, which could indicate alignment issues or electrical faults. Consistent brightness not only enhances visual appeal but also contributes to overall safety by reducing dark spots. - Inspecting Electrical Connections:
A detailed inspection of all electrical connections is crucial for long-term durability. Verify that all cables, connectors, and control units are securely fastened and free from potential hazards. This step is fundamental to ensuring that the installation will function reliably over time. - Site Cleanup and Post-Installation Maintenance Guidelines:
After testing, clear the site of any debris and restore the surrounding area to its original condition. Provide comprehensive maintenance guidelines to the end user, detailing periodic inspections, cleaning procedures, and troubleshooting steps. Clear maintenance instructions help extend the lifespan of the installation and ensure continued performance.
By following these detailed, step-by-step instructions, professionals can achieve a high-quality installation that adheres to industry standards and meets both aesthetic and technical requirements. Emphasizing precision in site preparation, structural integrity during foundation work, meticulous electrical connections, and rigorous final testing not only enhances the overall performance but also boosts the credibility of the project in the eyes of clients and search engines alike.
5. Troubleshooting & Maintenance
Ensuring that your installation remains in peak condition over its lifetime involves understanding common issues, employing systematic troubleshooting techniques, and adhering to a rigorous maintenance schedule. In this section, we delve into potential problems and offer detailed strategies for resolving them, alongside recommendations for long-term upkeep.
5.1 Common Issues Analysis
Over time, even the most carefully installed lighting systems may experience issues. Understanding these common problems is the first step toward effective troubleshooting:

- Foundation Loosening and Lamp Post Tilting:
Shifting soil conditions, water seepage, or inadequate concrete curing can lead to foundation loosening. This may cause the lamp post to tilt, resulting in misaligned lighting that compromises both aesthetics and functionality. - Wiring Faults and Electrical Malfunctions:
Over time, exposure to the elements can degrade wiring, leading to issues such as short circuits, intermittent power supply, or complete failure of electrical connections. Corrosion at connector points or damage to direct burial cables from moisture can be particularly problematic. - Water Leakage:
Inadequate waterproofing measures may result in water penetration into electrical enclosures or cable joints. This can trigger short circuits or corrosion, potentially rendering the lighting system inoperative. - LED Fixture Malfunctions and Uneven Brightness:
LED fixtures, though robust, can occasionally suffer from internal component failures. Symptoms include flickering, color shifts, or inconsistent brightness across different fixtures. Such issues may stem from faulty drivers, overheating, or manufacturing defects.
By identifying these common issues early, you can implement targeted measures to mitigate them and ensure consistent performance.
5.2 Troubleshooting & Resolution Strategies
Effective troubleshooting requires a systematic approach that isolates the problem, evaluates potential causes, and implements corrective actions:

- Step-by-Step Diagnostic Procedures:
- Visual Inspection: Begin with a thorough visual examination of the lamp post and its foundation. Look for signs of tilting, cracks in the concrete, or soil erosion around the base.
- Electrical Testing: Use multimeters and continuity testers to assess wiring integrity. Check for loose connections, corrosion, or water damage at junction points.
- Fixture Evaluation: For LED issues, test individual fixtures by swapping them with known working units. This can help isolate whether the problem lies within a specific fixture or the overall system.
- Waterproofing Verification: Inspect all waterproof seals, gaskets, and enclosures. Look for any signs of degradation or breaches where moisture could enter.
- Repair Recommendations:
- Foundation and Structural Adjustments: If tilting or loosening is detected, re-level the lamp post and reinforce the foundation using additional concrete or steel rebar. Ensure proper drainage to prevent recurrence.
- Electrical Repairs: Replace or repair corroded connectors and damaged cables. Upgrade waterproofing around sensitive electrical areas by applying high-grade sealants.
- Fixture Replacement: Replace malfunctioning LED fixtures or drivers. If uneven brightness persists, recalibrate the lighting control system to ensure uniform power distribution across all units.
- Regular Inspections and Preventive Maintenance:
Establish a routine inspection schedule to catch potential issues before they escalate. Regular maintenance checks can greatly reduce the risk of major failures by addressing minor problems early on.
5.3 Long-Term Maintenance Recommendations
Sustainable performance over the years depends on proactive, long-term maintenance strategies:

- Periodic Cleaning:
Dirt, debris, and environmental pollutants can accumulate on both the fixtures and electrical enclosures. Regular cleaning not only improves the appearance but also enhances heat dissipation for LED components, thereby extending their lifespan. - Routine Waterproof Seal Checks:
Waterproofing elements degrade over time due to exposure to UV rays, temperature fluctuations, and moisture. Schedule periodic inspections of seals, gaskets, and cable joints to ensure that the integrity of the waterproofing is maintained. Replace any components showing signs of wear or damage immediately. - Component Replacement and Upgrades:
As technology advances and certain components age, it is wise to replace outdated parts. This includes LED fixtures that have diminished brightness, aging control units, or cables that no longer meet current safety standards. Upgrading to the latest LED technology can further improve energy efficiency and overall system performance. - Documentation and Maintenance Logs:
Maintain detailed records of all inspections, repairs, and upgrades. This documentation not only helps in tracking the system’s performance over time but also provides valuable information for future troubleshooting and maintenance planning.
By implementing these comprehensive troubleshooting procedures and long-term maintenance strategies, you can ensure that your lighting installation remains reliable, efficient, and visually appealing for years to come. This proactive approach not only enhances operational safety but also bolsters the credibility of your installation, aligning with industry best practices and SEO standards that value detailed, expert-level content.
Additional Resources & FAQs
Video Tutorials & Illustrated Case Studies
For those looking to deepen their understanding of advanced lighting installations, a wealth of multimedia resources is available. Explore our curated video tutorials that walk you through every step of the process—from site assessment and foundation pouring to wiring and waterproofing. Detailed illustrated case studies further showcase real-world projects, highlighting best practices and innovative design solutions. These resources provide clear, visual guidance that can help both novices and seasoned professionals master the installation process. For example, check out our “Direct Burial Lamp Post Installation Tutorial” and “LED In-Ground Lighting: A Step-by-Step Visual Guide” available on our website and popular platforms like YouTube.
Expert Advice & User Community Insights
Beyond formal tutorials, gaining insights from industry experts and experienced installers can be invaluable. We regularly publish expert advice articles that discuss common pitfalls, innovative techniques, and advanced troubleshooting methods. Additionally, our active user community forum is a great place to share experiences, ask questions, and exchange tips. Whether you need advice on the latest LED technology trends or recommendations for optimizing your installation for local conditions, expert opinions and community feedback can help refine your approach and ensure long-term success.
Frequently Asked Questions (FAQs) & Quick Troubleshooting Tips
Here are some common questions along with quick troubleshooting tips to keep your lighting system running smoothly:
- How often should maintenance be performed?
Regular inspections every 6 to 12 months are recommended to check for structural integrity, waterproof seal degradation, and electrical performance. - What are the early signs of foundation issues?
Look for slight tilting, cracks in the concrete, or visible soil erosion around the base. Address these issues promptly to prevent further damage. - How can I prevent wiring faults?
Ensure all connections are secure and properly insulated. Regularly inspect direct burial cables for signs of corrosion or moisture exposure. - What should I do if an LED fixture shows uneven brightness?
Check for possible driver malfunctions or wiring issues. Swapping out a suspect fixture with a known good unit can help isolate the problem. - When is it time to upgrade or replace components?
If you notice recurring issues such as persistent moisture problems or significantly diminished light output, consider upgrading to newer LED systems and replacing aging components.
Recommended Products in the MG Smart Sensor Series
Below is our curated selection of smart sensor products from the MG series, each designed to deliver precise ambient light detection and efficient energy management for outdoor lighting systems. These products offer similar core functionalities to the MG-SN010, with varying enhancements to meet diverse application needs.
Product Comparison Table
| Parameter | MG-SN010 Smart Light Sensor | MG-SN011 Smart Light Sensor Pro | MG-SN012 Smart Light Sensor Plus |
|---|---|---|---|
| Model | MG-SN010 | MG-SN011 | MG-SN012 |
| Category | Smart Light Sensor | Advanced Smart Light Sensor | Smart Light Sensor with Extended Features |
| Operating Voltage | 12V DC | 12V DC | 12V DC |
| Operating Current | Not specified | Not specified | Not specified |
| Power Consumption | < 0.5W | < 0.4W | < 0.5W |
| Detection Sensitivity | High sensitivity | Ultra-high sensitivity | High sensitivity with extended range |
| IP Rating | IP67 (waterproof, dustproof) | IP67 (waterproof, dustproof) | IP67 (waterproof, dustproof) |
| Operating Temperature | -20°C to +60°C | -20°C to +60°C | -20°C to +60°C |
| Additional Features | — | Enhanced signal stability, precise measurement | Integrated timer and adjustable threshold |
Product Descriptions
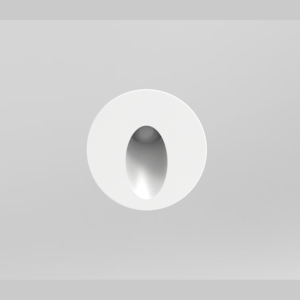
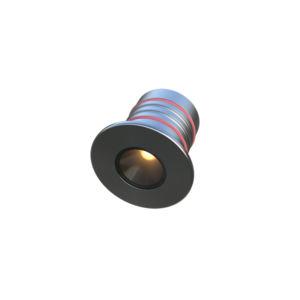
- MG-SN010 Smart Light Sensor
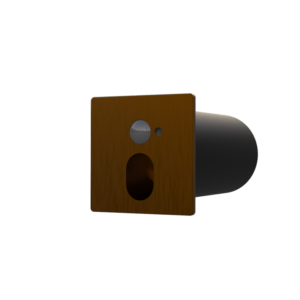
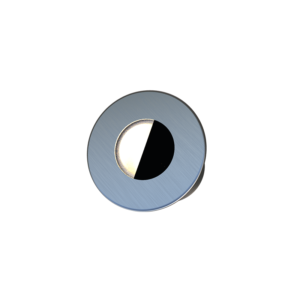
The MG-SN010 is designed to accurately detect ambient light and automatically adjust lighting outputs in real time. With its high sensitivity and robust IP67 rating, it is ideal for residential, commercial, and public outdoor applications where energy efficiency and reliable performance are essential. - MG-SN011 Smart Light Sensor Pro
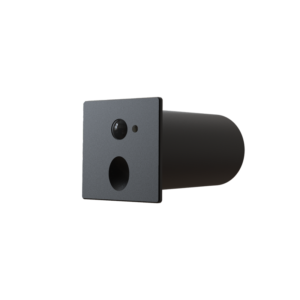
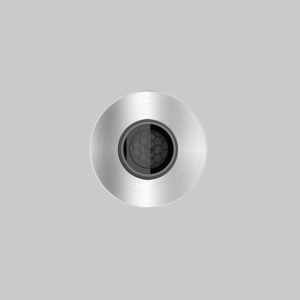
Building on the MG-SN010’s foundation, the MG-SN011 offers ultra-high sensitivity for even more precise light detection. This enhanced sensor ensures improved signal stability and more accurate ambient light measurement, making it perfect for projects that require tighter control over lighting conditions. - MG-SN012 Smart Light Sensor Plus
The MG-SN012 integrates additional features such as an integrated timer function and adjustable threshold settings. This makes it an excellent choice for applications where automated scheduling and fine-tuned light adjustment are required, providing extended flexibility in smart lighting management.
Why Choose These Products?
Each product in the MG Smart Sensor Series is engineered for seamless integration with modern outdoor lighting systems. Whether you’re looking for a cost-effective, reliable sensor like the MG-SN010, a more advanced solution with enhanced precision like the MG-SN011, or a feature-rich option like the MG-SN012, our MG series delivers high performance, durability, and energy efficiency. These sensors are essential components for building intelligent, automated lighting systems that adapt to real-time environmental conditions, ensuring optimal performance and extended system longevity.
By incorporating these advanced sensors into your outdoor lighting projects, you can achieve better energy management, enhance safety, and elevate the overall aesthetic of your environment. Choose the MG series that best fits your specific requirements to benefit from cutting-edge technology and professional-grade performance.